Introduction
Raze and Ruin was
an 8th edition Warhammer Fantasy tournament held in my home town of Leicester (within walking
distance of me in fact). It was run by
the Leicester Phat Katz in their usual gaming venue, although the TO, comp pack
monkey and public face of the event was Sandy Wilson, a familiar face from the
UK scene and one of the main contenders for “nicest guy in Warhammer” moniker.
This was the third
year the event had been run. In 2013 the
event had 24 players, increasing to 43 in 2014 and 59 this year, even with all
the uncertainty about whether people would come to an 8th after the release of
Age of Sigmar appeared to have driven a stake into the heart of the fantasy
gaming community.
At the 2013 event
I’d literally walked home with the wooden spoon, having occupied table 12 since
game two. I’d planned to go to the 2014
event but a babysitting problem meant I couldn’t make it. This year I was fortunate that my wife’s work
rota meant that she was off on the event weekend so I didn’t have to worry
about that.
The 2015 event was
2500 points using the 8th edition rules as well as the End Times books,
although the Host of the Eternity King and some of the End Times special
characters were banned. Also in use was Sandy ’s
own Tally Comp pack. While very little
was actual banned at the event, the Tally Comp gave each army a score based on
whether certain units or items were taken, with a stated aim of encouraging
players to take lesser used units.
Scores for individual units or items could be positive or negative and
the final tally score for an army would be added to the player’s tournament
points at the end of the event to determine the final placing. (If you want to read more about Tally Comp
following this link to find the pack.)
As this was
potentially the last Warhammer tournament I’d ever play in, I initially decided
I was going to take something a lot different to what I’ve run in the
past. Looking at what I’d got on my
painting table and what I thought I might be able to get painted before the
event I spent a lot of time looking at double Star Dragon and double Moon
Dragon lists. Unfortunately, due to the
negative impact the release of Age of Sigmar has had, certainly on the local
club scene, I was only able to get two practice games in for the event, one
with a double Star Dragon list and one with the double Moon Dragon list. Even that practice turned out to not have
been worth the time as I realised about a month before lists were due in that
with the painting time available to me I was highly unlikely to be able to
finish the accompanying unit of Dragon Princes I was planning to use to
accompany the dragons.
Needing to come up
with a list that I could put together quickly without needing a lot of painting
doing, I went back to my army list from last year’s Blood and Glory
tournament. As that was a 2400 point
event I had to add a few points in core, which I achieved by bumping up both
Archers unit to 16 models, although in one of the few concessions I made to the
fact that this was a different event I dropped the standards from all my Core
units. Both Swordmaster units were
increased to 23 models with full command as well. Other than that the only list changes were
tweaks to the magic item load out on my second Archmage. As I didn’t have time for any practice games
with this list I decided to leave the magic lore the same as for Blood and
Glory.
Archmage (General)
– Lore of High Magic
- Level 4
- Dispel Scroll
- Talisman of
Preservation
- Ruby Ring of Ruin
Archmage – Lore of
Light
- Level 4
- Book of Hoeth
- Khaine’s Ring of
Fury
- Relic Sword
Noble
- Battle Standard Bearer
- Dragon Armour
- Shield
- Great Weapon
- Banner of the
World Dragon
5 Ellyrian Reavers
- Bows and Spears
5 Ellyrian Reavers
- Bows and Spears
5 Ellyrian Reavers
- Bows and Spears
16 Archers
- Musician
16 Archers
- Musician
23 Swordmasters
- Full Command
- Razor Standard
23 Swordmasters
- Full Command
- Banner of Eternal
Flame
Lion Chariot
Great Eagles
- Shredding Talons
Great Eagles
- Shredding Talons
Eagle Claw Bolt
Thrower
Eagle Claw Bolt
Thrower
Game 1 – Ben Atkinson – Bretonnia - Battleline
My first game of
the event was against Bretonnians. As
one of those armies I’d not played a lot (this was my fourth game ever against
them) I wasn’t quite sure how I wanted to approach this. The only thing I did know was that I did not
want to be fighting the Knight of the Realm bus (and all the characters I
assumed would be in it) one on one if I could help it.
Bretonnian Lord
- Shield
- Barded Bretonnian Warhorse
Prophetess
- Level 4 Wizard
- Lore of Heavens
- Bretonnian Warhorse
Paladin
- Battle
- Barded Bretonnian Warhorse
Paladin
- Morning Star
- Lance
- Shield
- Barded Bretonnian Warhorse
Paladin:
- Morning Star
- Lance, Shield
- Barded Bretonnian Warhorse
Damsel
- Level 2 Wizard
- Lore of Beasts
- Bretonnian Warhorse
Damsel
- Level 2 Wizard
- Lore of Life
- Bretonnian Warhorse
15 Knights of the Realm
- Full Command
5 Knights of the Realm
- Champion
5 Knights of the Realm
- Champion
Grail Reliquae with Battle
- 6 Battle
5 Mounted Yeomen
- Shields
- Musician
3 Pegasus Knights
- Champion
3 Grail Knights
Trebuchet
Trebuchet
Spells
Archmage – High
Magic
1 – Drain Magic
2 – Hand of Glory
3 – Walk Between
Worlds
4 – Arcane
Unforging
Archmage – Lore of
Light
1 – Light of Battle
2 – Net of Amyntok
3 - Banishment
4 – Birona’s
Timewarp
Prophetess – Lore
of Heavens
1 – Iceshard
Blizzard
2 – Curse of the
Midnight Wind
3 – Comet of Cassandora
4 – Chain Lightning
Damsel – Lore of
Life
1 – Flesh to Stone
2 - Regrowth
Damsel – Lore of
Beasts
1 – Wyssan’s
Wildform
2 – Amber Spear
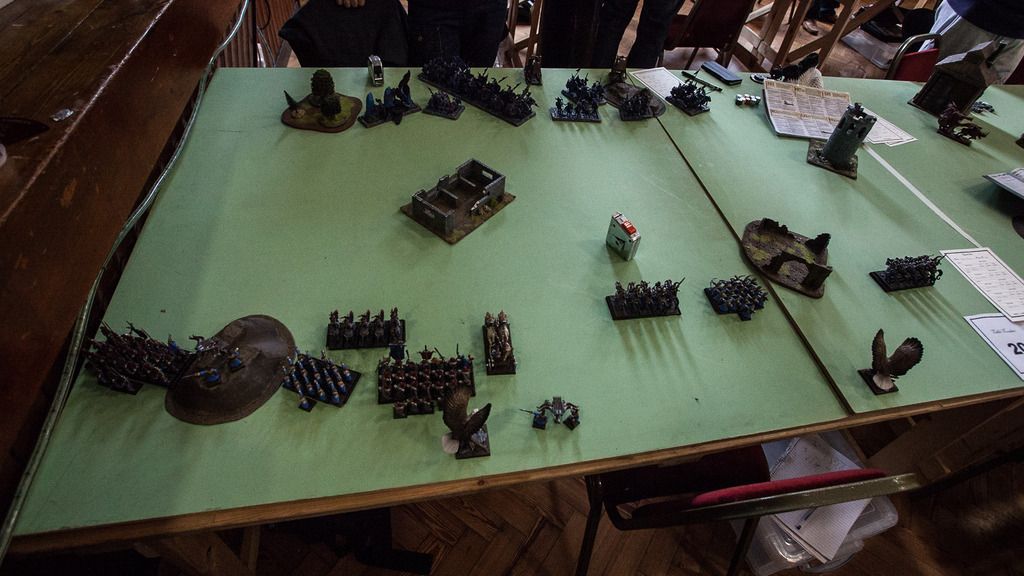
Deployment
On my side of the
table there was a hill in the left
quarter of my deployment zone with a ruin (that for simplicity’s sake we
decided to treat as a wood) just in front of the right quarter. Ben had a forest in the left quarter of his
deployment zone as I looked at it, a small hill almost in the right quarter of his
deployment zone and a tower just in front of the right quarter. There was
another ruin about two feet from the left board edge and slap bang on the mid
line of the board.
Ben deployed his
Pegasus Knights to the right of the wood with the Grail Reliquae next to
them. The small Realm Knight units
clustered about the hill with a trebuchet behind it and the other trebuchet
about eight inches to the left of it.
The Mounted Yeomen were up on the deployment line in front of the
trebuchet and the big Knight of the Realm bus was deployed diagonally pointing
towards the bottom right corner of the board.
As I usually do
with this type of list, I spread my three units of Reavers and the Great Eagles
across the board before deciding, despite the presence of the trebuchets, to
concentrate my forces in the left corner, hoping that this would mean Ben’s
horse mounted knights would take longer to get to me. This meant that to the left of the hill I had
one unit of Swordmasters with the Light Archmage, a bolt thrower on the hill
and a unit of Archers to the right of it.
The second unit of Swordmasters was next to them containing my BSB and
General with a unit of Reavers in front and an Eagle behind. The Lion Chariot was just to the right of the
Swordmasters and then a little way behind and to the right of that was one of
the Bolt Throwers. Roughly central in my
deployment zone was another Reaver unit and three or four inches to their right
was the other Archer unit. The second Eagle
was almost on the table edge a ways behind the forest/ruin while my last Reaver
unit was to the right of the building.
With vanguard moves
Ben moved the Pegasus Knights close to the building in the centre as well as
pushing the Mounted Yeomen forward. For
my part I chose to edge the Reavers on the left and right flanks up.
Game
Winning first turn
Ben aggressively pushed up the Mounted Yeoman in front of my central Reaver
unit. The Peg Knights flew up into range
to threaten the left Reavers with the Reliquae following them up. The Knight bus performed a big wheel with its
march move to end up pointed towards the right-most of my Bolt Throwers while
the nearest small Realm Knight unit and the Grail Knights moved up alongside.
In the magic phase
I left through Iceshard Blizzard on the left Eagle only to see Ben then fail to
get the expected Comet off. The Level 2
then managed to cast Amber Spear at the Lion Chariot with irresistible force,
doing enough wounds to take it off. From
the miscast result his Prophetess and one of the Damsels took a wound, although
the Prophetesses’’ was negated by the Prayer Icon of Quenelles.
The Mounted Yeomen
fired their bows at point blank into the Reavers in front of them but only one
managed to score a glancing hit on a helmet.
The first trebuchet took aim at general’s unit of Swordmasters but
misfired, being unable to shoot until the next turn. The other had no such bad lack with the shot
scattering only two inches and hitting eight Swordmasters, killing six. This was enough to cause a panic test which
they failed and then failed again with the BSB re-roll, causing the unit to
flee off the board, closely followed by the nearby Great Eagle.
Needless to say,
while I’d expected to take a bit of a kicking before I got a chance to even
move a unit, I hadn’t expected to lose two fifths of my points, and certainly
I’d hoped not to have lost my unit best placed to chop through the Bretonnian
armour. My plans changed from trying to
get my combat units as unmolested as possible into his bus to trying to pick up
what points I could to try and avoid getting 20-0’ed.
As I didn’t fancy
running the risk of trying to shoot off the Mounted Yeoman and then having them
whip round and shoot down my remaining Eagle or the right hand Bolt Thrower, I
charged them with the Reavers. Not really
knowing how potent a threat the Grail Knights might be I charged them in the
flank with the Reavers on the right flank.
The Reavers from the left flank conducted the third charge, into the
Grail Reliquae to try and hold that up.
The rest of the army stayed put for the time being.
In the magic phase
I ended up with 11 dice versus six. I
started out by casting Banishment at the Pegasus Knights which Ben threw five
dice at to dispel. I then tried to cast
Net of Amyntok at them, this time drawing out a dispel scroll. Finally I cast a boosted Light of Battle
which was successfully cast.
Shooting was
totally ineffective with nothing getting through the Bretonnian armour
saves. The Reavers fighting the Grail
Knights did their job of holding them in place, the turn seeing them reform at
the end of the drawn combat to face their Elven foes. Likewise the Reavers fighting the Reliquae
succeeded in holding it in place, although they needed to pass a break test to
do so. The Yeomen proved more resilient
than expected, with the survivors holding the Reavers in place.
The Bretonnian’s
counter-charged in their second turn, with the Peg Knights charging the Bolt
Thrower on the hill, the Realm Knights accompanying the bus charged the Reavers
fighting the Yeomen and the Realm unit on the right charging the Reavers
fighting the Grail Knights. Meanwhile
the bus moved further on towards my left corner.
In the magic phase
I decided to chance letting Comet off.
The Beasts wizard cast an irresistible Amber Spear at the other Bolt
Thrower, destroying it and putting a wound on the Prophetess and the previously
unwounded Damsel. The trebuchets
targeted the remaining Swordmasters with one misfiring and the other scattering
off.
While the Grail
Knights and Realm Knights fighting the Reavers on the right were victorious,
the Knights in the centre were evidently put off their stride by having to
fight alongside the Yeomen as only one Reaver was toppled and the Reliquae
failed to finish off the Reavers fighting it, albeit reducing them to one man. The
Pegasus Knights did as expected and overran from the Bolt Thrower.
High Elf turn two
and the Archers on the right charged into the Reaver/Yeomen/Realm combat to try
and weight of numbers to the fight. The
surviving Eagle flew out to diver the bus while the Swordmasters moved up the
table to try and get out of reach of the bus.
The other unit of Archers reformed to face the Peg Knights.
Magic saw the Comet
not come down again. I tried to cast Net
on the bus and Pha’s on the Swordmasters which were dispelled but did succeed
in casting Light of Battle. The left
unit of Archers shot at the Pegasus knights but couldn’t get anything through
their armour save.
The Grail Reliquae
finally managed to grind out the last Ellyrian Reaver fighting them while the
support of the Archers charging into the combat with the Mounted Yeomen and
Knights of the Realm only resulted in a drawn combat.
Ben charged the
Grail Knights into the flank of the Archers in the massed combat of mounted and
infantry troops as well as the bus of knights into the blocking eagle.
Meanwhile the Grail Reliquae headed off for safety while the Pegasus Knights
flew over to the other side of the Archers.
The unengaged Realm unit moved through the wood.
The Comet was stuck
in the sky again and Ben rolled a three dice magic phase with a channel to have
four dice to my two. He attempted to
cast Regrowth but I managed to double-six the dispel roll to stop it. The trebs were ineffective again with one
scattering so far off the Swordmasters nothing was under the template while the
other misfired.
Bretonnia’s elite
knights failed to tip the balance in the main combat and suffered the ignominy
of seeing one of their number toppled by a lowly Elf archer. Predictably the Great Eagle was not able to
stand up to the charge of the Realm bus.
In my turn three
the surviving Swordmasters reformed to present their front to the Realm bus
while the unengaged Archers reformed to face the Pegasus Knights once more.
I kicked off the
magic phase by casting Banishment at the bus, rolling a mighty two hits, only
one of which wounded, killing a knight.
Ben threw all his dice at dispelling Birona’s Timewarp that the Light
wizard attempted to cast on her own unit and used the Silver Mirror to stop
Light of Battle being cast. I was successful in casting Net on the Realm bus
for all the good it was likely to do me.
The Archers shot at
the Pegasus Knights and finally managed to get the last wound through to kill
one, causing the unit to panic off the board.
That was the sole bit of good news that turn as the remaining Ellyrian
Reavers and the other Archer unit lost their combat. While they had finished off the Yeomen and
the Reavers held, the Archers fled with the Grail Knights in pursuit.
The Archers were
then chased off the board by the Grail Knights at the start of Ben’s fourth
turn and the bus charged into the Swordmasters.
The unengaged Realm unit continued moving up in support.
The Magic phase
finally saw the comet come down and Ben rolled a might 2” for the affected
area, which touched nothing whatsoever.
The first spell cast was Iceshard Blizzard at the Swordmasters which I
used all my dispel dice to stop. This
meant Ben was able to get Curse of the Midnight Wind and Wyssan’s Wildform
through unopposed.
Yet again the
shooting from the trebuchets was appalling as both units targeted the remaining
Archers but failed to hi them. In combat the last Ellyrian Reaver was cut
down. The other combat was also an
almost foregone conclusion as the Swordmasters, despite managing to put a wound
on the Bretonnian Lord, could not cut through the armour and ward saves of the
characters in the front rank of the bus while they themselves were cut down
mercilessly.
With not much left
to do except see if I could get any more points the Archers shot at the unit of
Knights of the Realm in front of them.
With not enough troopers left to provide protection to the Damsel, one
of the Archers’ arrows cut her down.
Turn five and the
bus turned to face the flank of the
Archers as the Grail Knights moved up.
With the last bit of breathing space given them, the Archers tried to
shoot down the Grail Knights but could only kill one.
Turn six and the
Realm bus charged into the flank of the Archers and wiped them out for no
wounds in reply.
So a bit of a
disaster for my first game then. While
my lack of experience against Bretonnians didn’t have me expecting to win
necessarily, I’d hoped to at least rack up a few tournament points and possibly
push for a draw but losing the general’s unit first turn before it got a chance
to do anything put paid to that. From
that point on it was damage control but despite scraping just over 400 points
the fact that I lost my entire force gave Ben the 20-0 result.
No comments:
Post a Comment